Crack In Finished Drywall

Встроенное видео If you need help with drywall repair in your home, this post guides you through repairing large and small drywall holes in your walls. Includes video and step-by-step.
Встроенное видео Patching a Settlement Crack in Drywall: Drywall expert Mark McClain demonstrates his top tips for repairing drywall in your home, including how to patch a settlement.
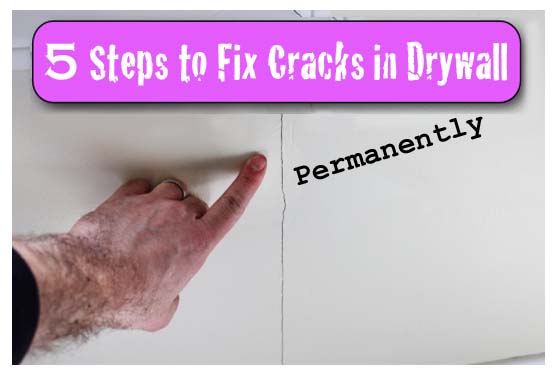
Do you have a crack in your drywall that keeps coming back.
Today s post will help you fix this annoying problem in 5 easy steps using 3M s Patch Plus Primer.
This weekend I was cleaning out the guinea pig cage that sits in our living room did you know guinea pigs can live from 5 to 8 years, what the and noticed a crack in our wall under the window.
Apparently the previous homeowners tried to fix it since there was evidence of old joint compound around the crack.
Dealing with old rental homes has taught me a thing or two about drywall and plaster. After reading this post I guarantee you ll be able to permanently fix any drywall crack in no time.
Materials:
Fiberglass mesh drywall tape
3M Patch Plus Primer
Putty knife
6 inch drywall knife
Joint compound mud pan
Sanding sponge
Towel for your floor
Your wall paint
2 to 3 episodes of Big Bang Theory
That s not a bad supply list. My grocery list puts it to shame and is far more expensive and that s without buying Dogfish Head IPA beer.
Let s get started and eliminate your cracked drywall
Instructions:
Step 1: Apply Fiberglass Mesh Tape to Your Drywall Crack
One of the biggest mistakes anyone can make is to just add joint compound or spackling to the drywall crack. Over time the crack will come back because the compound or spackling will never win the fight between it and your house settling. It s like Pee Wee Herman challenging Mike Tyson.
Adding fiberglass mesh drywall tape to the crack is like giving Pee Wee anabolic steroids.
Center the tape on the crack. Since one side is sticky you can place it on the wall and get your Patch Plus Primer ready.
Step 2: Add a Thin Coat of Patch Plus Primer to the Drywall Tape
3M Patch Plus Primer is great for repairing cracks or holes in drywall because it doesn t require a primer coat like traditional joint compound. So you save time and money
Big Tip: when you buy 3M Patch Plus Primer at the hardware store make sure it hasn t been opened. Otherwise, it might be bad and unusable. The same principle applies to any product that comes in a container including pre-mixed joint compound.
Apply a thin coat of Patch Plus Primer over your mesh tape. Just enough to fill the voids and make the tape adhere even more to the wall.
If your crack is long say 2-5 feet I recommend applying the patch plus primer to the tape with a 6 inch drywall knife. To do this, you ll have to scoop some of the Patch Plus Primer into a mud pan to use the larger knife.
Add the spackling by starting in the middle of the tape. Spread the spackling on the tape in a downward motion from the center. Then go back and add the rest of the spackling moving upward from the center of the tape.
This stretches the tape along the crack and prevents it from wrinkling.
Allow this coat to dry for 30 minutes and watch 1 episode of Big Bang Theory.
Step 3: Add Your Second Coat of Patch Plus Primer
The reason for the light coat of 3M Patch Plus Primer in Step 1 is so you don t have a big hump on your wall where the tape is located.
Use your 6 inch knife to put on a second coat of the Patch Plus Primer.
Make the width of the new coat be two inches to the right and 2 inches left of the center of the tape.
Then smooth out the spackling with your 6 inch drywall knife like you did in Step 2 always starting in the center and moving toward the ends.
The key tip I have here is to apply slightly more pressure on the side of the knife that touches the drywall. This pressure change will feather the Patch Plus Primer and blend it into the existing drywall.
Depending on your skill and how perfect you want the wall you may have to apply a 3rd coat.
Step 4: Lightly Sand the Patch Plus Primer
For small drywall repair jobs I like to use a fine grit sanding sponge to feather the edges of spackling or joint compound. Lightly move the sanding sponge in a circular motion over the patched area. Circular motions will help blend the patch into the drywall.
It will take a well trained eye to notice where you made your repair.
Step 5: Paint Your Wall
The best part about the 3M Patch Plus Primer is that you don t have to prime it.
Patch Plus Primer can be painted over after 30 minutes. Use a good quality paint brush or roller. I ve been using a Purdy 2 inch brush for 2 years now and while the handle is rusted, the bristles look fantastic. I always rinse my brush in warm water then wrap it in Glad Press N Seal. Brittany also has a great tutorial on keeping your paint brushes looking new.
The wall looks pretty darn good, wouldn t you say.
I m gonna go out on a limb here but I think even Dr. Evil would be pleased with this job.
Now you know the secret to permanently fixing a drywall crack. This entire project can be done in one afternoon or over the weekend without breaking a sweat.
Brittany also has a great tutorial on how to finish drywall seams.
Do you have any burning drywall questions. Ask away in the comment section below and I d be happy to help
Make it a great day.
Learn more about Jeff.
1Edit step
Make sure the drywall is ready to be finished. After the drywall is installed, you should look for any screws that are sitting proud of the wall. Drive them in until they are recessed just slightly. Remove any bits of the drywall s outer paper layer that are torn or loose. This will keep them from becoming mixed into the joint compound and showing.
2Edit step
Stir the joint compound. Drywall joint compound sometimes called mud is sold in large buckets. Remove the bucket s lid and check for a layer of water on top of the compound. If water is present, mix the compound thoroughly with a drill fixed with a mixing paddle. If no water is present, mixing is not necessary.
Cover the screws and joints with joint compound. Load your mud box or any other container you use for holding the joint compound using a 5-inch 125 mm drywall knife. Load the knife with joint compound and use it to fill in the gaps between drywall panels. Use the compound to cover exposed screw heads as well.
When all joints and screws are covered, pass over the areas with the knife to smooth out the joint compound. The smoother the joint compound, the less work you ll have to do later when you apply a second or third layer of compound.
Apply drywall tape to all joints. Unroll a few feet of tape and position the tape over the freshly applied joint compound covering each joint. Gently press the tape into the joint. Unroll more tape and continue covering the joint until you reach the end of the wall. Tear the tape against the drywall knife blade to achieve a clean edge.
When taping an inside corner, you should pre-crease the tape. Cut the tape to length first, bending it back on itself to crease it. Apply the tape to the corner by gently pushing it into place with the drywall knife.
5Edit step
Smooth the tape with your drywall knife. Hold the 5-inch knife against the taped joint at a shallow angle. In one continuous motion, pull the knife across the joint, pressing the tape into the compound. Excess joint compound can be scraped off into the mud box.
Cover outside corners with joint compound. Outside corners do not require drywall tape, as they should be affixed with corner beads. Apply joint compound over each side of the bead smoothing it with a single pass of the 5-inch 125 mm drywall knife.
Metal or plastic outside corner beads come in 10 foot 3 m segments, so you ll probably need some tin snips to cut them down to size. They are great for protecting your outside corners against dings and other damage throughout the years.
7Edit step
Allow all the compound to dry for about 24 hours. At this point, after the first layer of mud, your drywall is still going to look patchy. Don t be concerned about being able to see a little drywall tape, or having different consistencies on mudded surfaces. You re going to apply at least another coat of compound; these imperfections will even out and become invisible soon.
Sand the first coat of joint compound. After 24 hours, sand it down gently to smooth it. Use a medium-grit sandpaper, and do not sand too hard. Joint compound is fairly soft, so sanding too much will quickly wear it away and fray the drywall tape.
A small sanding block works well for inside corners, while a pole sander is efficient for sanding seams and outside corners.
Why do Drywall Seams Crack. You have just moved into your new house or reoccupied the rooms that you had renovated. The new drywall was painted and looked beautiful.
Find simple tricks for fast, flawless drywall finishing at. How to Repair a Drywall Crack Eventually even the best-built houses develop.
What Causes Cracks in my Drywall. Ask an Expert There are many reasons why cracks may be caused in drywall. As soon as you see a crack, even a hairline one.
From the smallest dent to large holes, there are several ways to fix surface defects on your walls. Learn to patch and repair drywall.
